balenaEtcherをUbuntuを使ってみました。
特に細かいインストールなど不要でAppimageから起動できます。
簡単にLinux(Ubuntu)でもSDやUSBにイメージを書き込む方法を紹介します。
balenaEtcherをUbuntuで使ってみたメモ
balenaEtcherをUbuntuを使ってみました。
Appimageから起動しています。非常に簡単です。
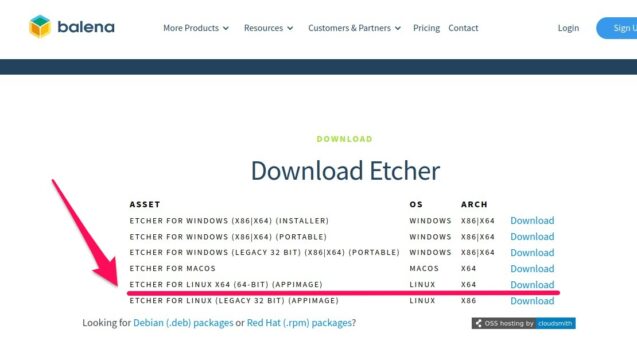
balenaEtcherのAppimageをダウンロード
balenaEtcherのサイトからLinuxのAppimageをダウンロードします。
「Etcher for Linux x64 (64-bit) (AppImage)」を入手します。

balenaEtcher - Flash OS images to SD cards & USB drives
A cross-platform tool to flash OS images onto SD cards and USB drives safely and easily. Free and open source for makers...
etcher.balena.io
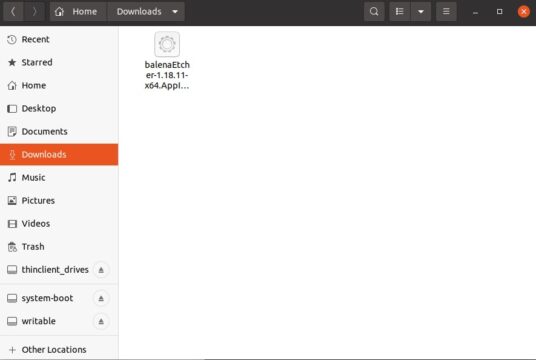
ダウンロードすると下記のような「~.Appimage」のファイルを取得できます。
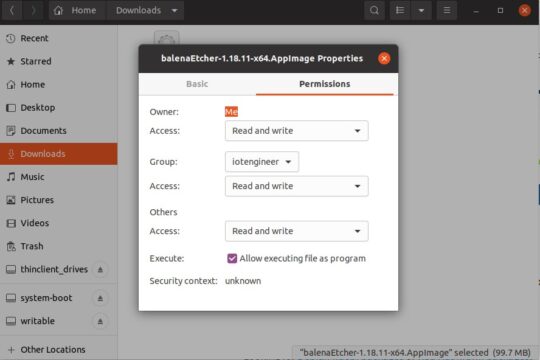
Appimageにアクセス権をつける
そのままAppimageを実行しても、許可がない(Permission denied)とエラーになります。
|
1 2 |
~/Downloads$ ./balenaEtcher-1.18.11-x64.AppImage bash: ./balenaEtcher-1.18.11-x64.AppImage: Permission denied |
balenaEtcherのAppimageにアクセス権を付けてあげます。
chmod 777 balenaEtcher-*.**.**-x64.AppImage
|
1 2 |
~/Downloads$ chmod 777 balenaEtcher-1.18.11-x64.AppImage ~/Downloads$ ./balenaEtcher-1.18.11-x64.AppImage |
またはGUIからプロパティのPermissionを下記のようにRead/Writeできる形にします。
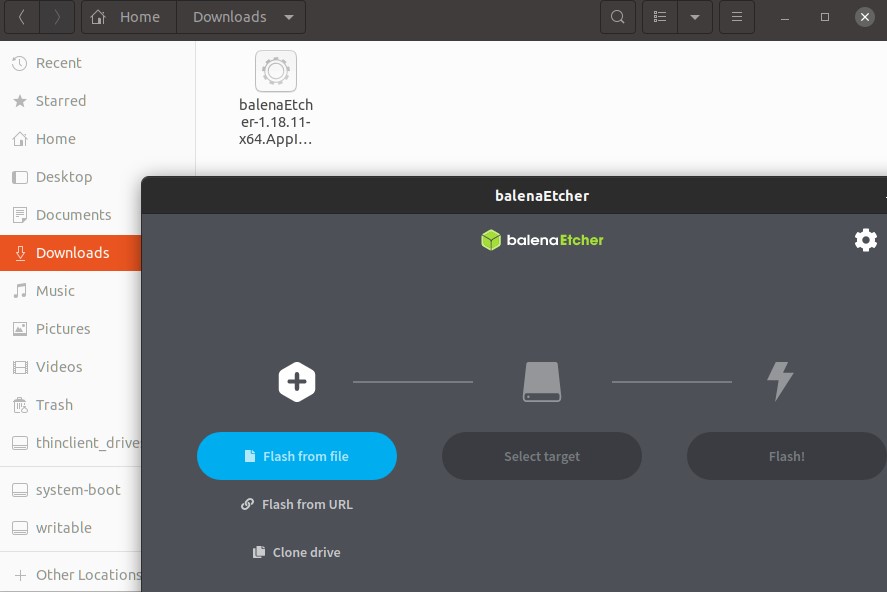
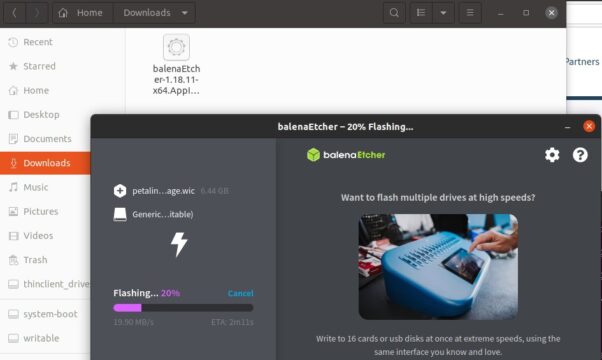
Appimageを起動する
balenaEtcherのAppimageを起動します。
./balenaEtcher-1.18.11-x64.AppImage

あとは自由にSDやUSBなどにイメージを書き込むだけです。
まとめ
balenaEtcherをUbuntuを使ってみました。
特に細かいインストールなど不要でAppimageから起動できます。
簡単にLinux(Ubuntu)でもSDやUSBにイメージを書き込む方法を紹介しました。


コメント